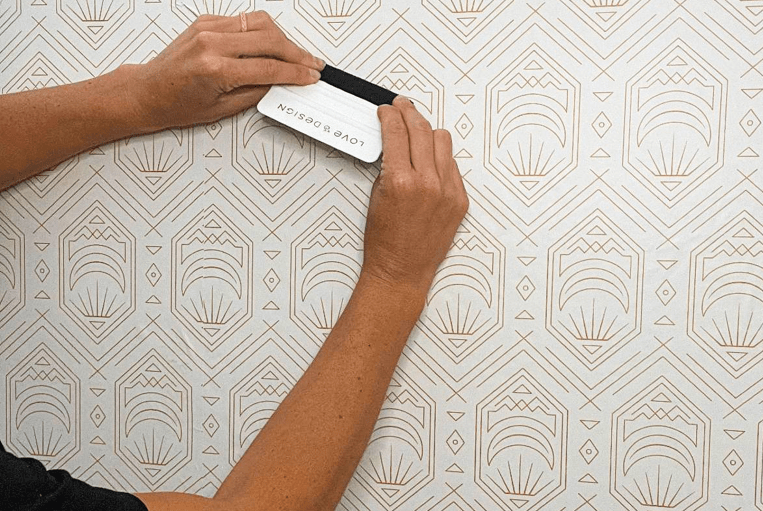
Wallpaper is a creative way to transform your living space and add personality to your walls. Whether you opt for peel-and-stick or traditional wallpaper, having the right tools and knowing the installation techniques can make the process much smoother. Here are all the essential tools you need to install both types of wallpaper and valuable tips for successful installations to give your installation a professional look.
Tools for Both Peel-and-Stick and Traditional Wallpaper
- Wallpaper: The first tool you’ll need is the wallpaper itself. Ensure you have enough rolls to cover your intended area, and double-check the pattern and color before starting. Double check your measurements as most wallpaper comes in two-foot wide rolls. So make sure you have enough to span the entire wall and that you have a couple of extra inches as you will overlap each panel and don’t want to come up short.
- Tape Measure: Measure the dimensions of your walls accurately to determine how much wallpaper you need. This step is crucial to avoid over- or under-ordering.
- Utility Knife or Wallpaper Cutter: A sharp utility knife or wallpaper cutter is essential for trimming excess wallpaper and making precise cuts around corners, outlets, and switches.
- Smoothing Tool: A wallpaper smoothing tool, also known as a seam roller or wallpaper brush, removes air bubbles and creases, ensuring a smooth and even application.
- Level: A level helps you create straight and plumb reference lines, ensuring that your wallpaper is applied evenly and aligns with the room’s layout.
- Sponge and Water: A damp sponge activates the adhesive on the back of traditional wallpaper. For peel-and-stick wallpaper, it can be handy for cleaning any adhesive residue or smoothing out wrinkles.
Tips for Peel-and-Stick Wallpaper Installation
- Start from a Plumb Line: Use a level to draw a straight vertical reference line on the wall to align the first strip of wallpaper accurately. This is vital to your installation. If that first panel is not plumb, you won’t be able to line up your following panels, making the installation miserable. So, take all the time you need to get the first panel right, and things will go smoothly after that.
- Peel and Stick Carefully: Peel a small portion of the backing away at a time as you apply the wallpaper to avoid sticking it to itself or the wrong spot on the wall.
- Smooth Out Bubbles: Use a smoothing tool to press out any air bubbles or wrinkles as you go. Start from the center and work your way outward. Most wallpaper providers will provide you with a squeegee that you can use to smooth out your wallpaper as you go.
- Trim with Precision: Use a utility knife or wallpaper cutter to trim any excess wallpaper along the ceiling, baseboards, and corners. Make clean, straight cuts for a professional finish.
When removing and replacing wallpaper its important to have the right tools and understand the steps involved.
Tools for Traditional Wallpaper Installation
In addition to the tools mentioned above, you’ll need the following for traditional wallpaper installation:
- Wallpaper Adhesive: You’ll need the appropriate adhesive depending on the type of wallpaper you choose. Some wallpapers come pre-pasted, while others require separate adhesive application.
- Paste Brush or Roller: These tools apply adhesive to the back of the wallpaper before hanging it.
- Wallpaper Tray: A wallpaper tray is a container large enough to hold the wallpaper strip after it’s been pasted. This allows the paper to relax and the adhesive to activate.
Tips for Traditional Wallpaper Installation
- Prep the Wall: Ensure that the wall surface is clean, smooth, and free from imperfections. Fill in the cracks or holes, and sand the surface for a smooth finish.
- Book the Wallpaper: After applying adhesive to the back of the wallpaper, “book” it by folding the pasted sides together, with adhesive sides facing each other. Allow it to sit for the recommended time to activate the adhesive.
- Align Patterns: When hanging wallpaper with a pattern, ensure that each strip aligns correctly to maintain a seamless look. This requires careful measurement and matching.
- Smooth Out Bubbles: Use a smoothing tool to eliminate air bubbles and wrinkles as you hang each strip. Work from the center towards the edges.
- Overlap and Trim: Overlap adjacent strips slightly (about 1/8 inch) and trim along the ceiling, baseboards, and corners with a sharp utility knife.
- Clean Excess Adhesive: Clean away any excess adhesive with a damp sponge immediately to prevent it from drying on the wallpaper.
Installing wallpaper, whether peel-and-stick or traditional, can be a satisfying and transformative DIY project. Armed with the right tools and following the tips provided, you can achieve a professional-looking finish that enhances the beauty of your home. Remember to measure accurately, take time, and maintain patience throughout the installation to ensure the best results. With attention to detail and a little practice, you can create stunning wall decor that reflects your style and creativity. You can find thousands of designs at LoveVsDesign in a peel and stick style as well as a traditional prepasted style so you can get the exact look you are looking for in your house.

